As the number of devices organisations control grows, keeping track of accurate inventory data becomes increasingly difficult. This can lead to inefficiencies and outdated information. You can use ServiceNow for end-to-end management of your devices, along with keeping your Configuration Management Database (CMDB) accurate by synchronizing data from Intune to

As the number of devices organisations control grows, keeping track of accurate inventory data becomes increasingly difficult. This can lead to inefficiencies and outdated information. You can use ServiceNow for end-to-end management of your devices, along with keeping your Configuration Management Database (CMDB) accurate by synchronizing data from Intune to ServiceNow. This way, you can ensure that all the information in your CMDB is accurate and up-to-date. When you sync data from Microsoft Intune, you can see more detail about the computers, mobile devices, and software programs running on them. This makes managing the entire device life cycle easy, from purchase to disposal.
You can integrate Microsoft Intune with ServiceNow using the Service Graph connector, but this connector is available as a paid add-on. With this post, I will show you how to set up your own dev instance for ServiceNow and integrate it with Microsoft Intune using Graph APIs - without paying a single buck! I will also show you how to configure the newly released feature of Intune Suite -"ServiceNow connector."
ServiceNow is a popular ITSM tool that automates various business processes. It is the most widely used among businesses and is often used to automate the management of IT services.
ServiceNow offers free, full-featured Personal Developer instances (PDIs) to registered users who want to develop applications on the ServiceNow platform or improve their skills with ServiceNow. Registered users can access PDIs through the online portal or through the ServiceNow application programming interface (API). The steps are as below:


You will also receive the login details of the PDI on the registered email address.
The default role assigned to you on your PDI is App Engine Studio Creator and it needs to be elevated before we proceed further. Change the role to admin, log out and log in again with admin user.


These are the minimum required permissions to set up the connection. Since, I am using it for complete device management, so I have added few more permissons.

Configure OAuth2.0 Profile
The first step after creating the app is setting up the ServiceNow connection using OAuth. The steps are as below:
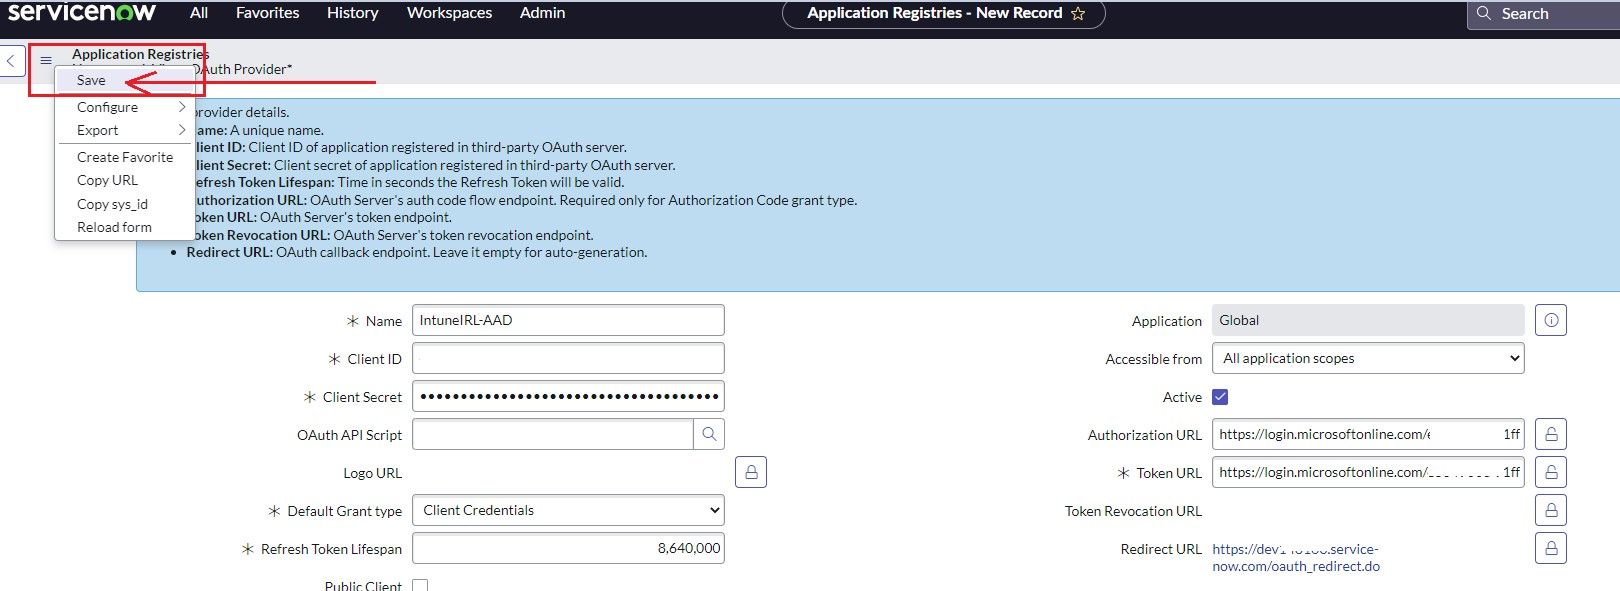
System OAuth > Application Registry and click New.
Connect to a third party OAuth provider

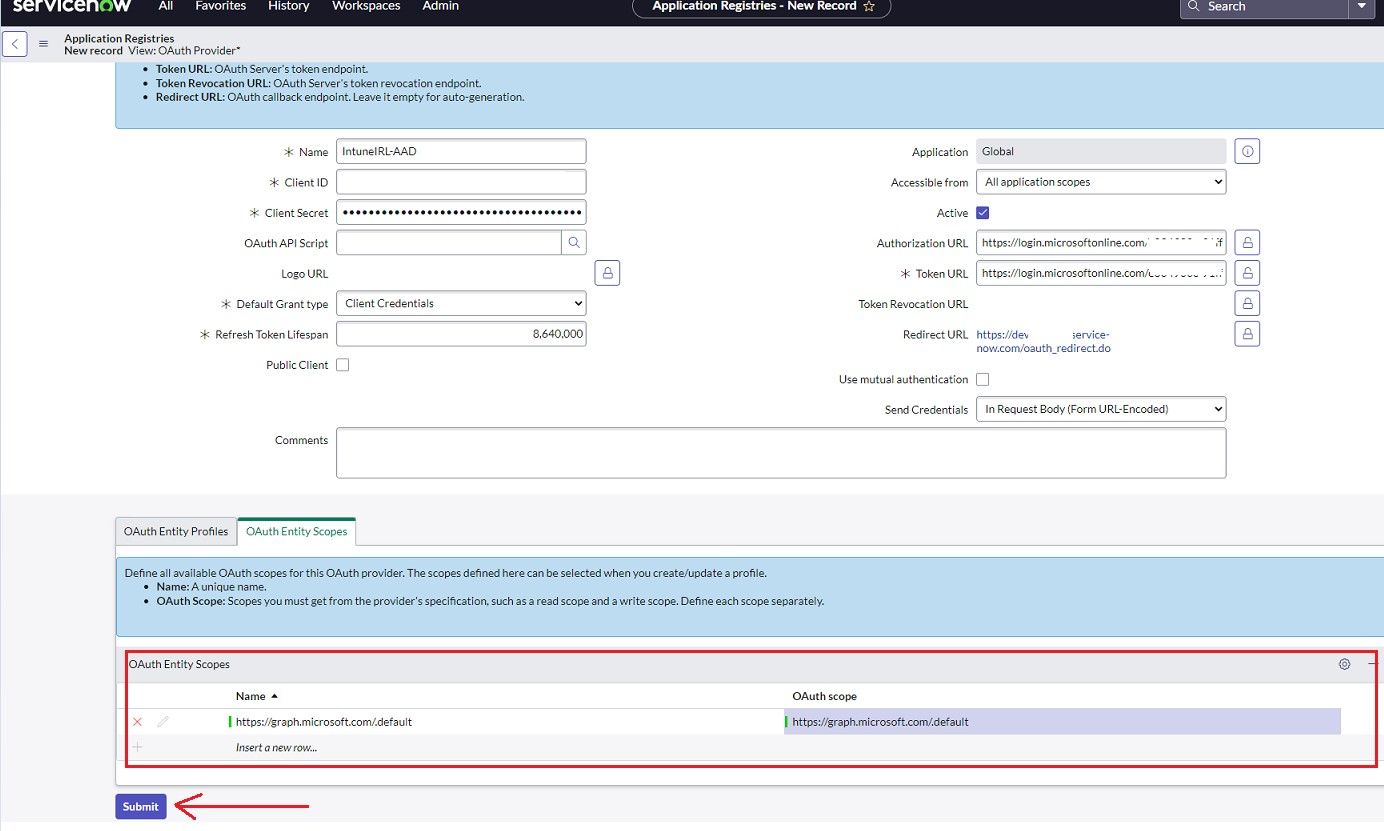
https://graph.microsoft.com/.default for both name & OAuth fields and click Update.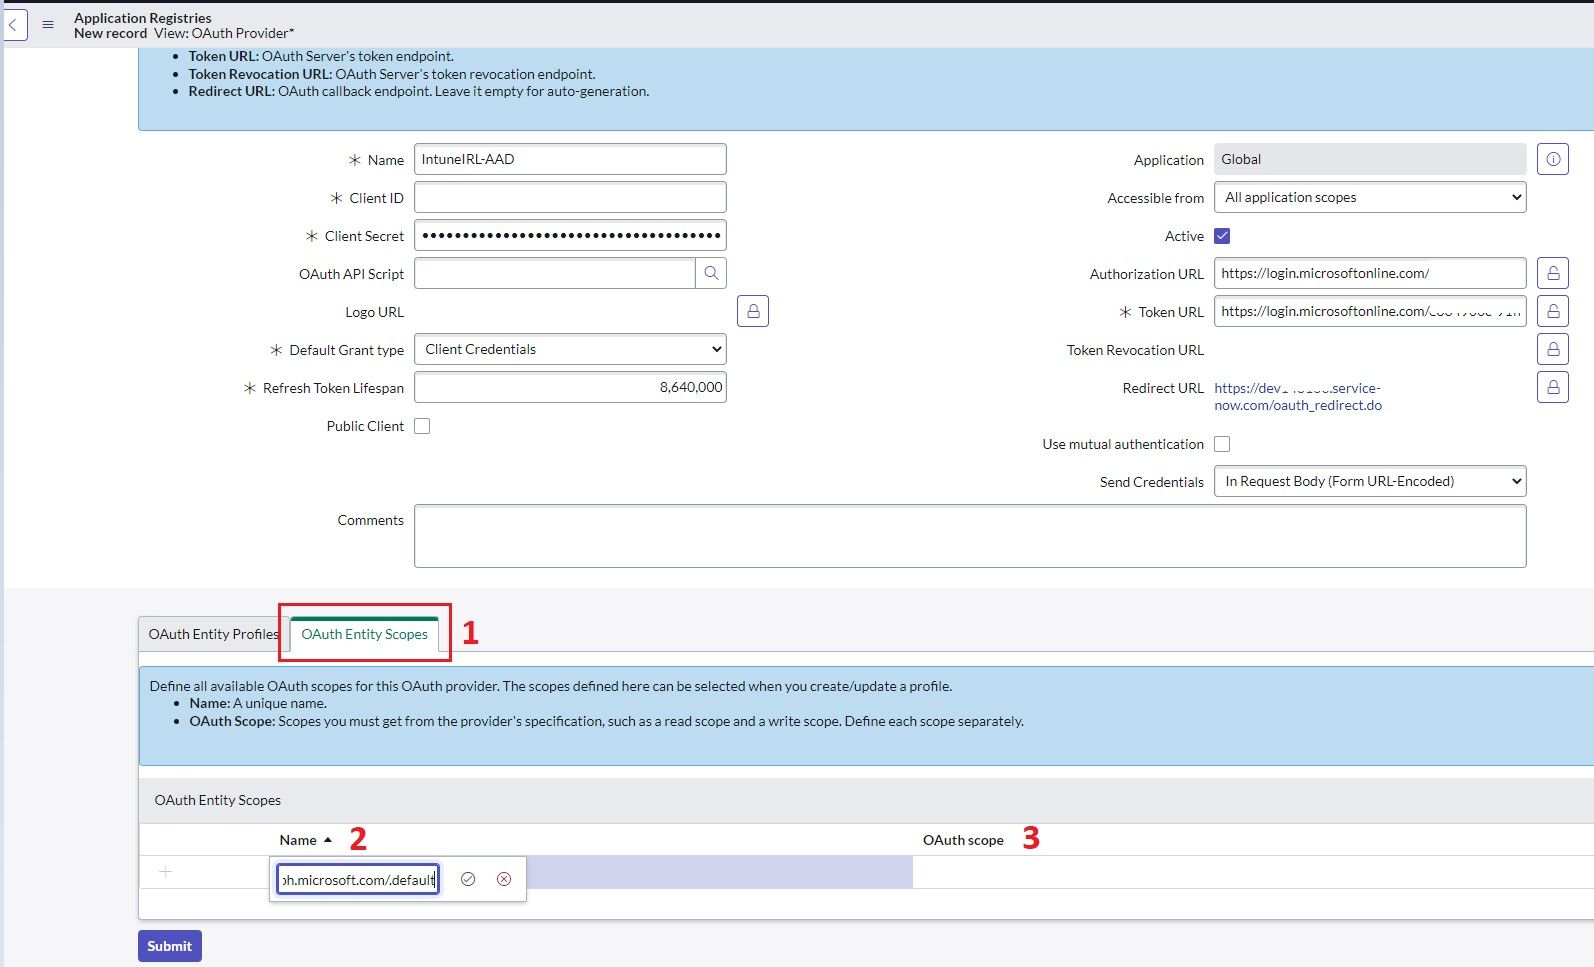
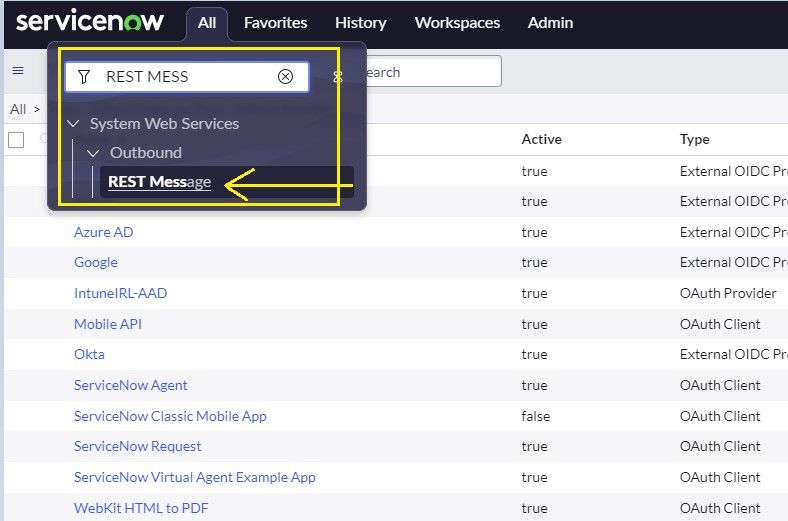
To test whether your application registry works, we will generate a token using your registry. Navigate to System Web Services > REST Messages and create a new one.

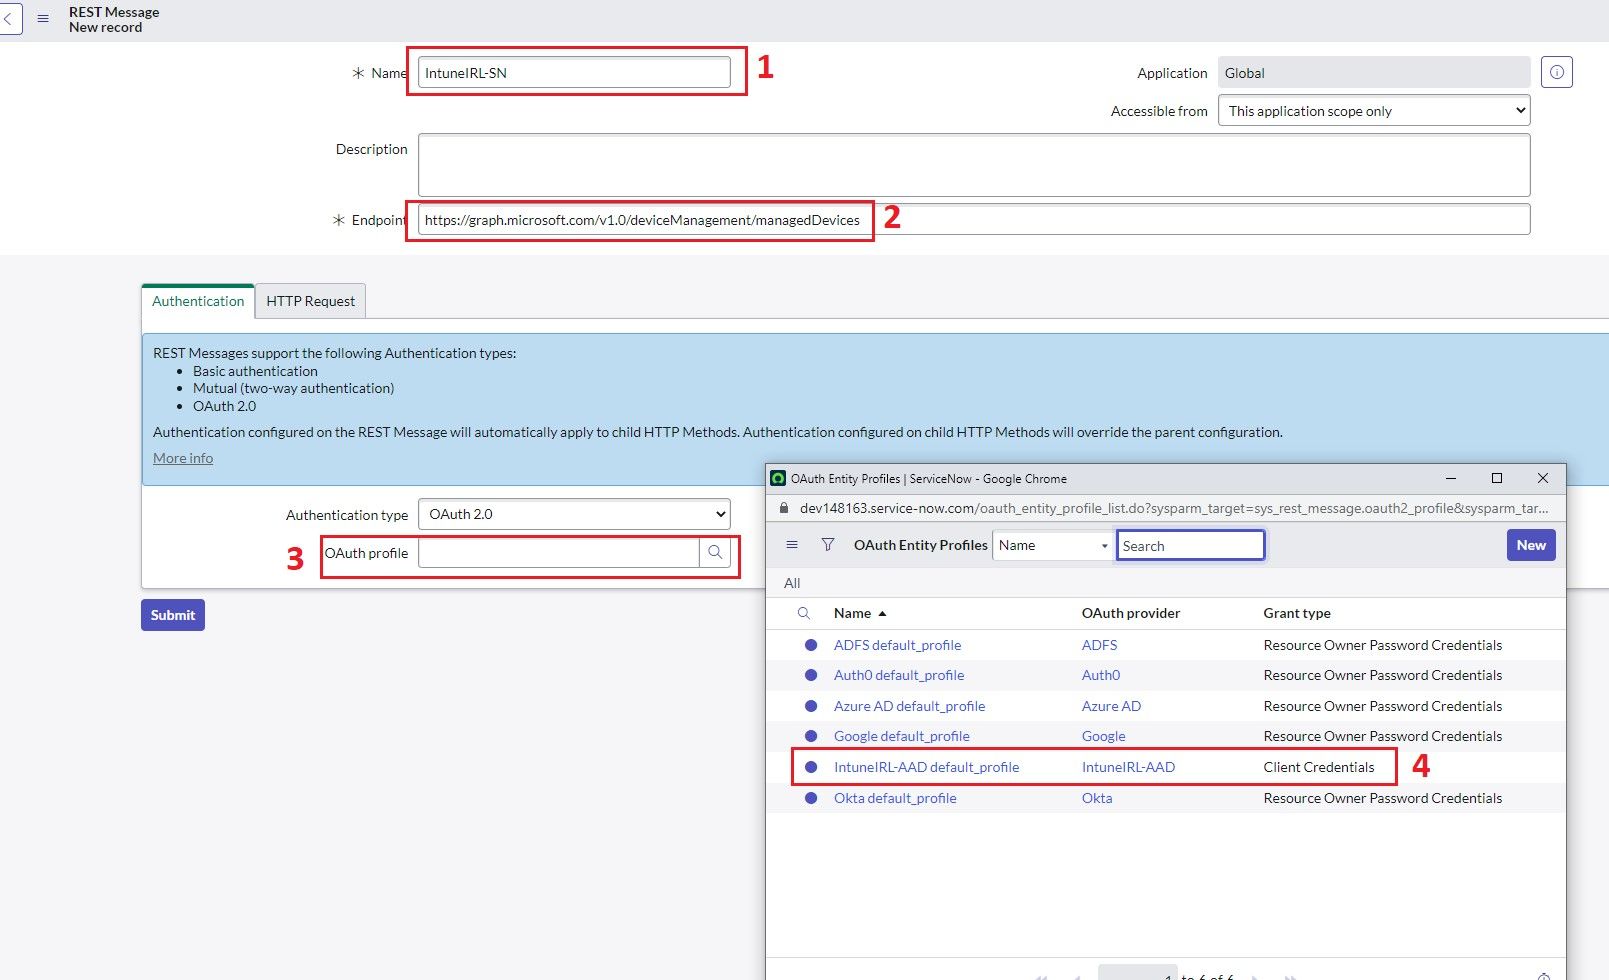
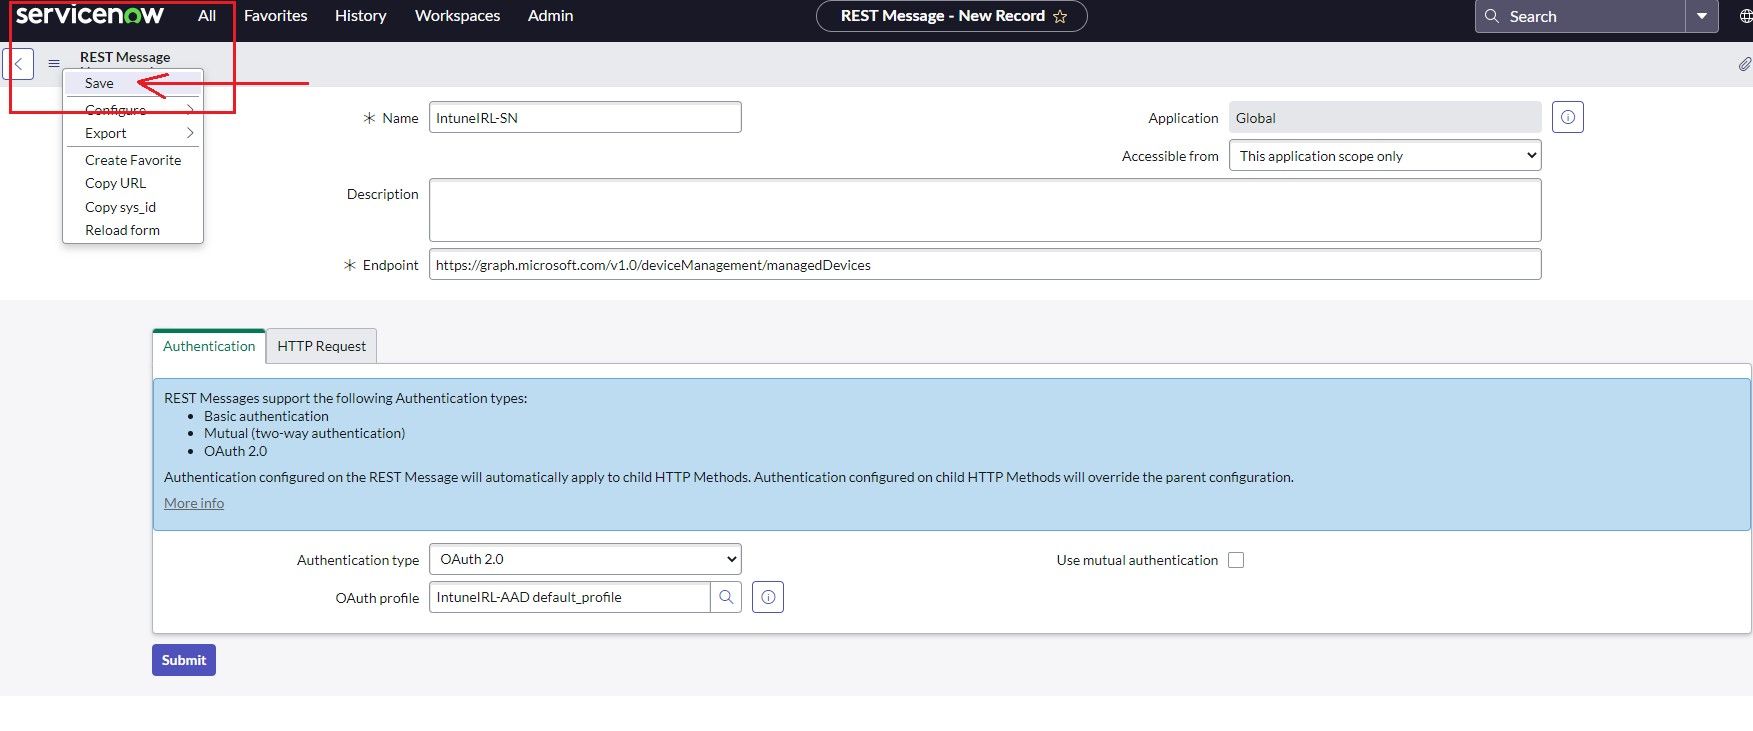
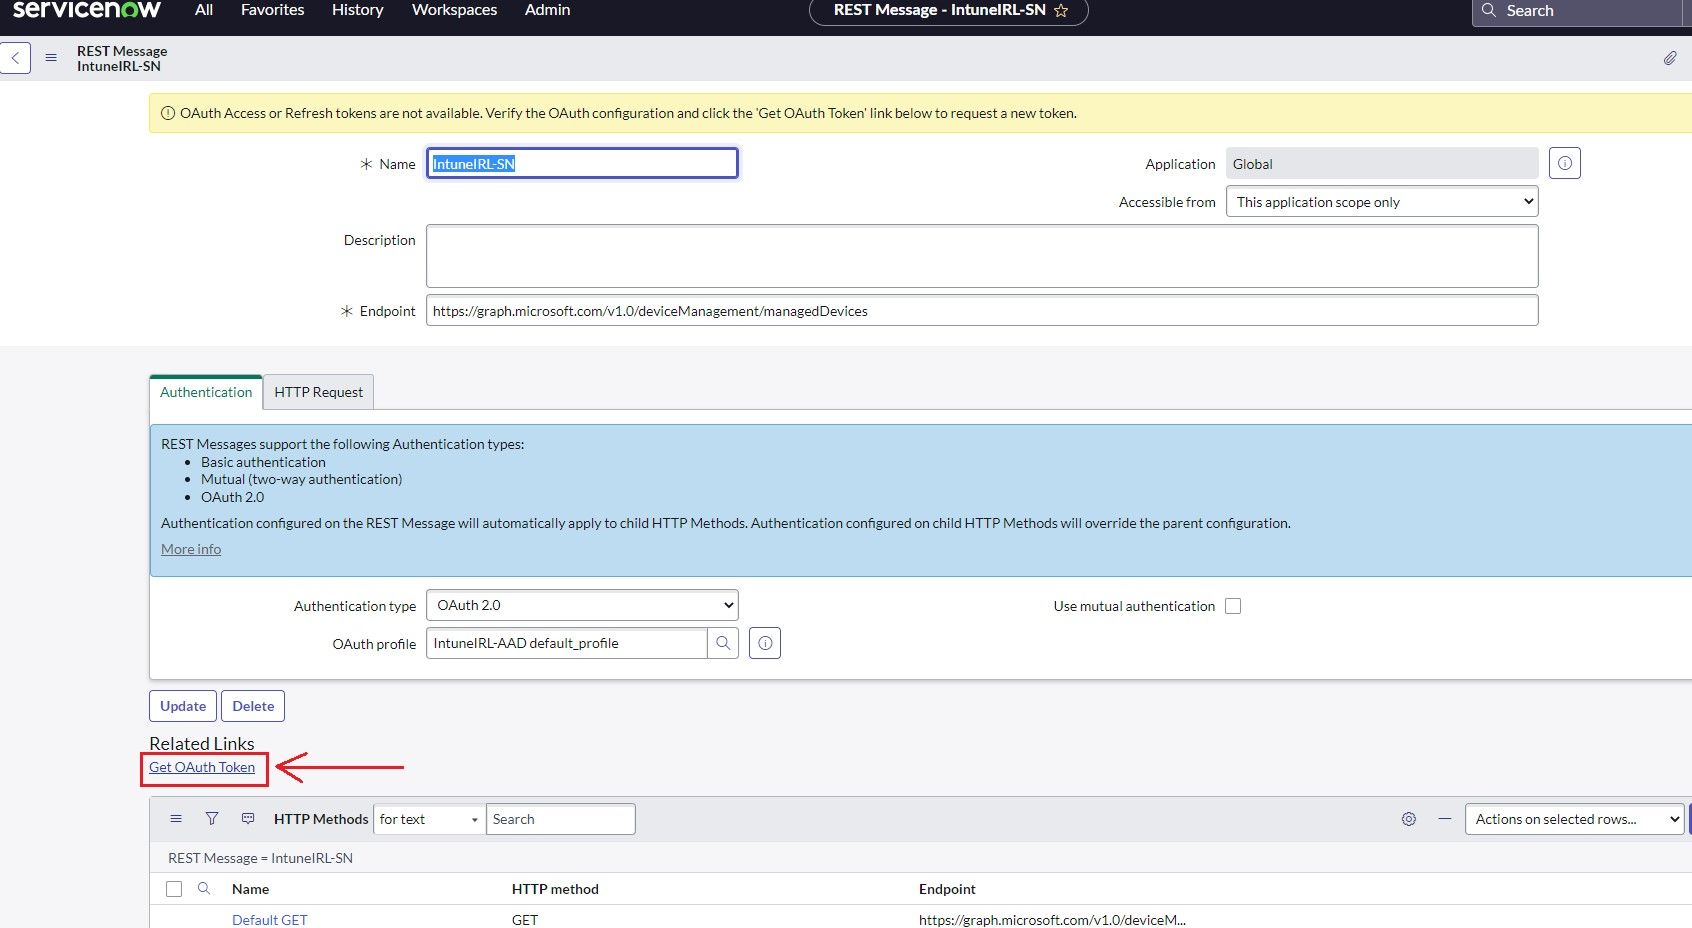
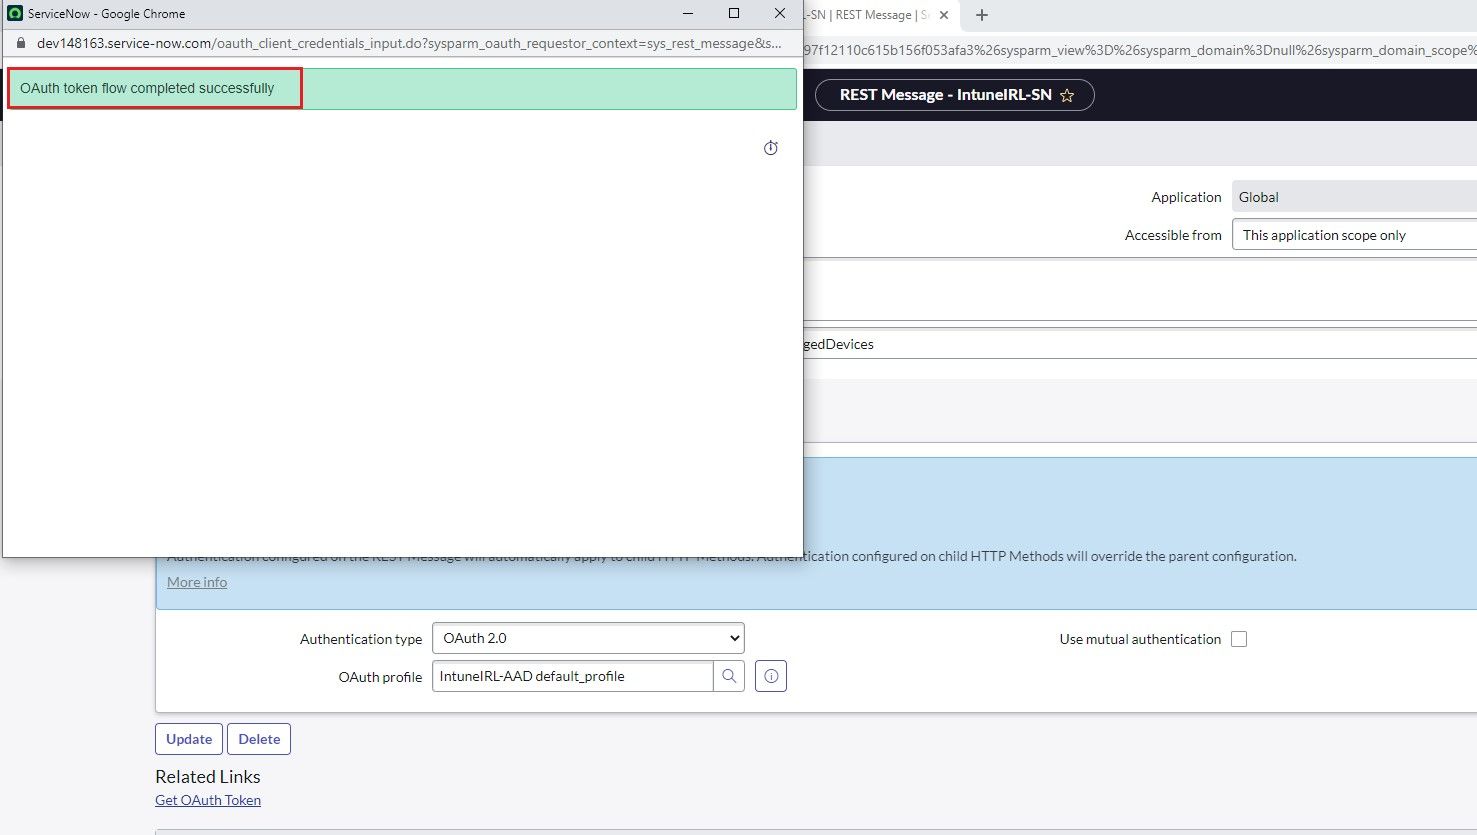
So, the next part is to create a data source and put all the data you are getting from Intune into tables.


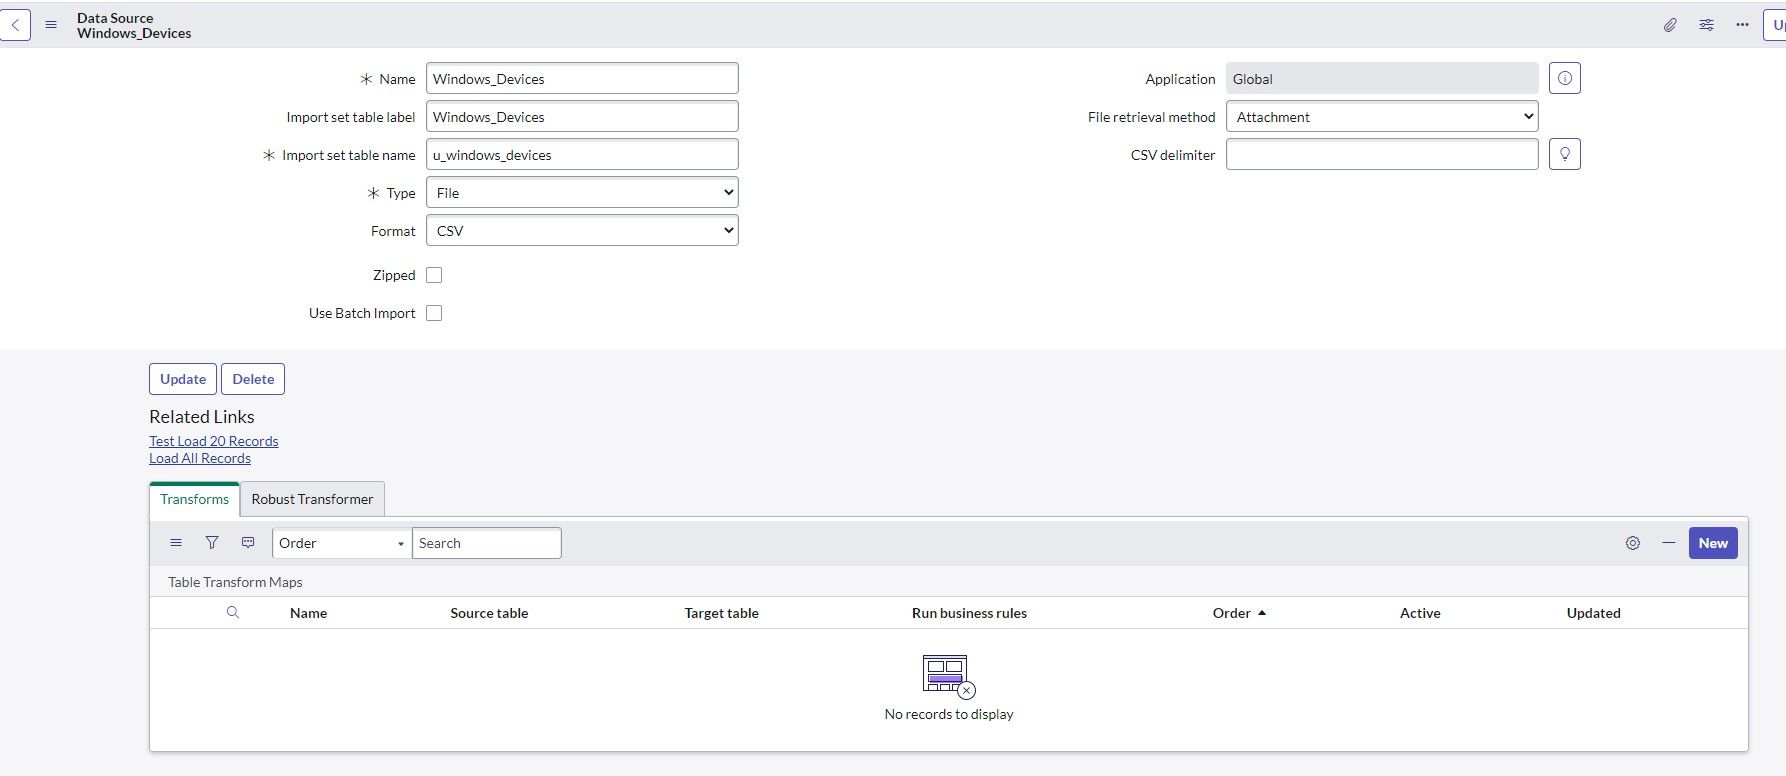
You can also test by loading test data by clicking "Test Load 20 Records".

Once the data is successfully loaded, you will receive a message like this.

The next step is to categorize your CIs in your CMDB.


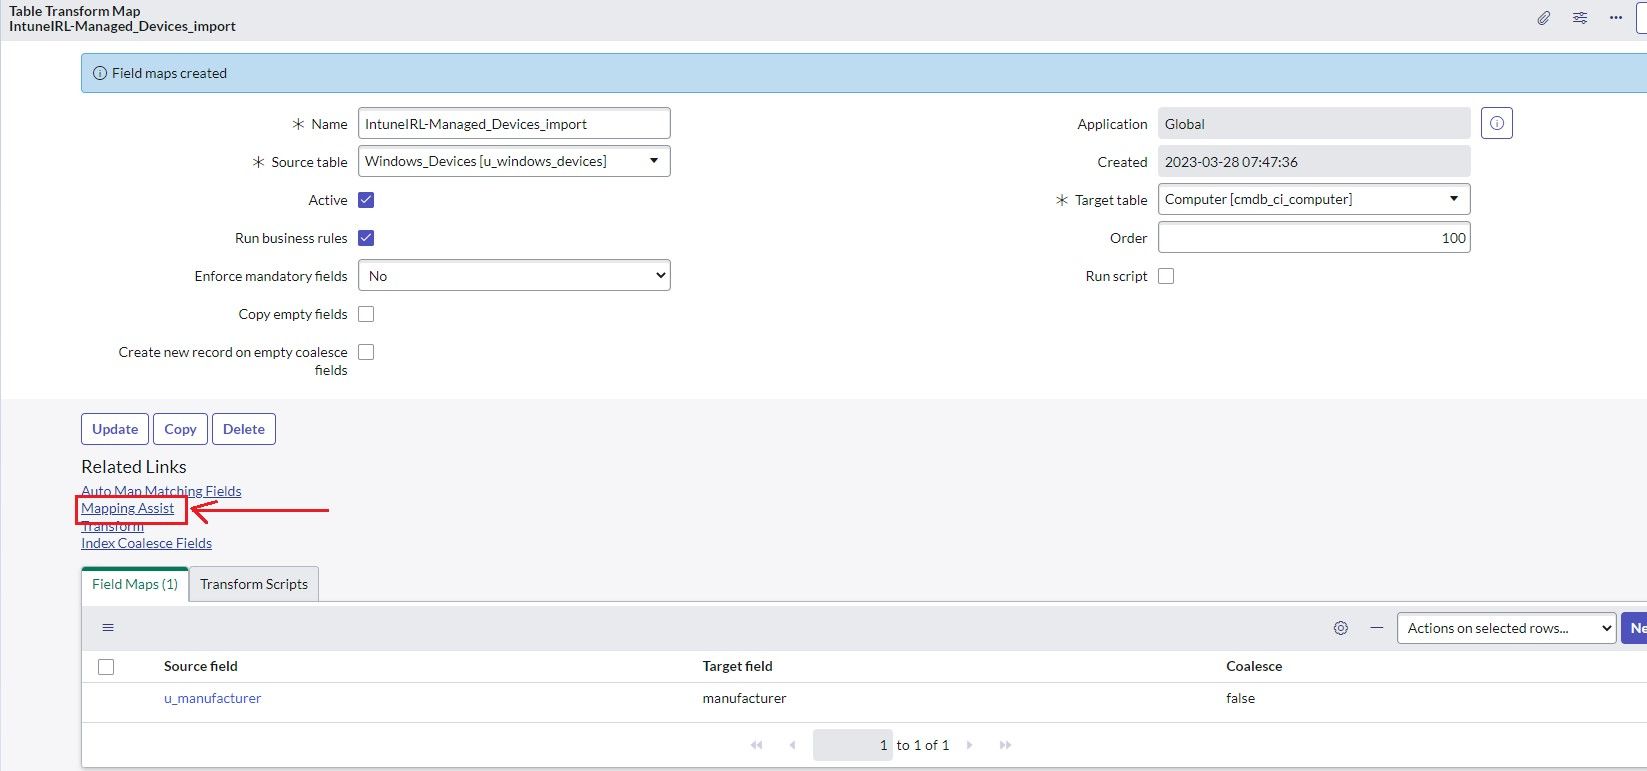

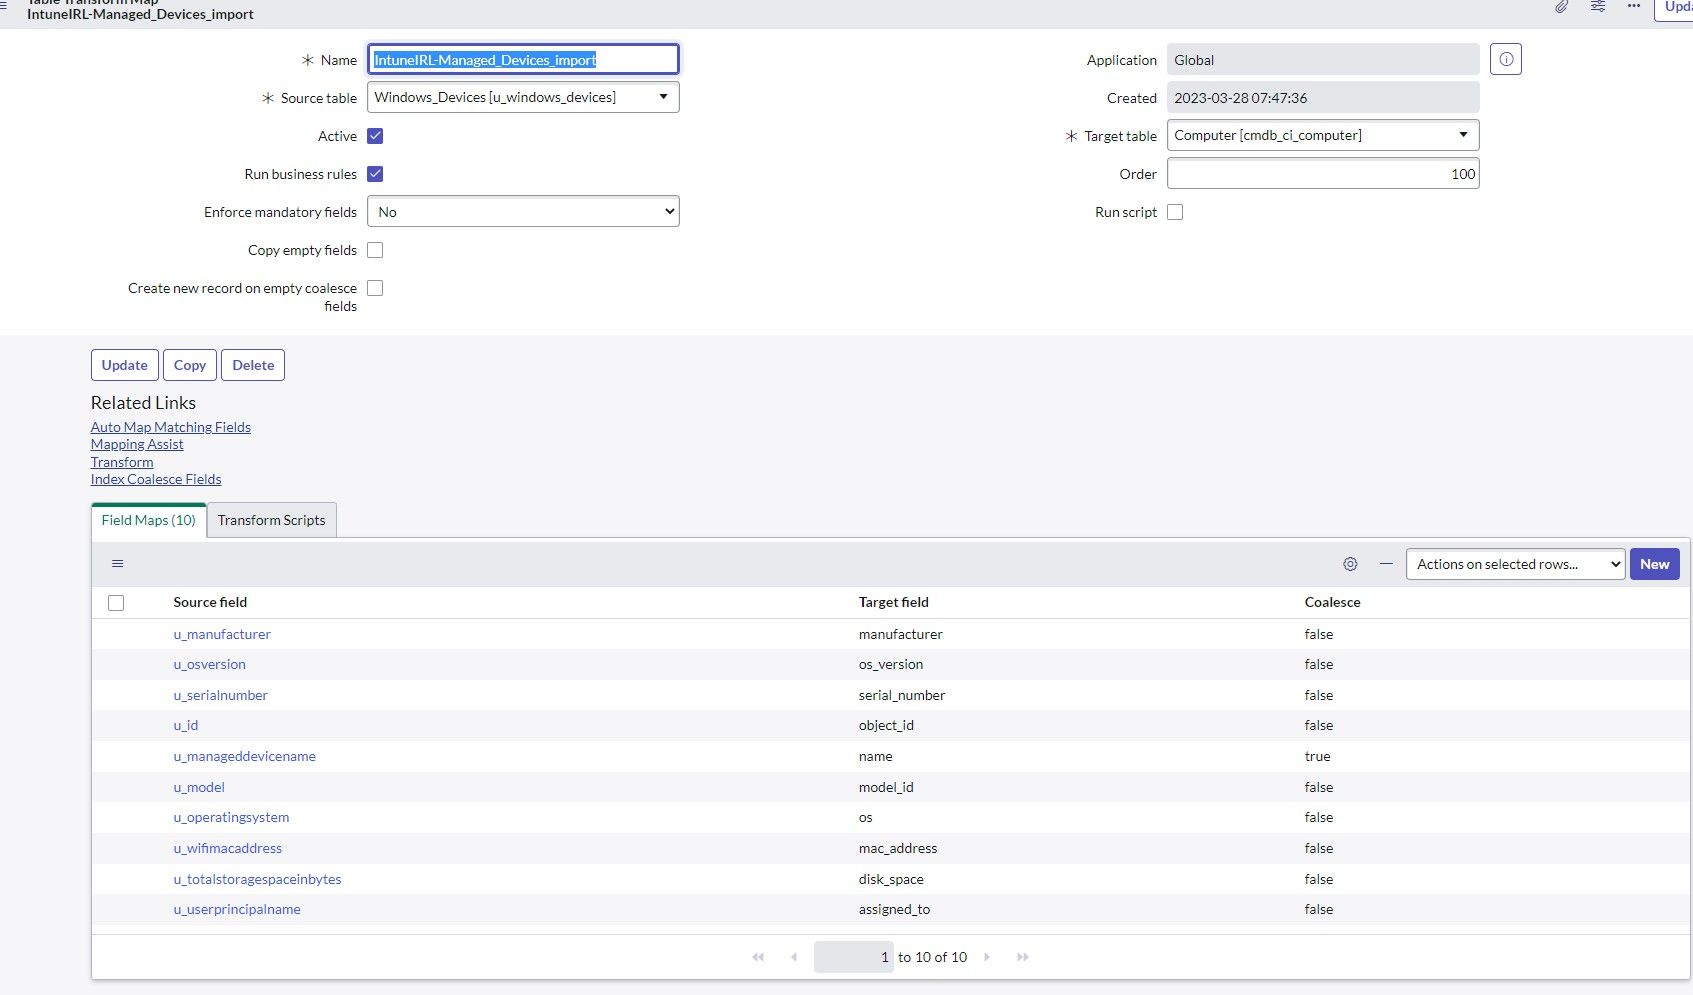
In production environments, this is automated & scheduled using scripts.

The redirect URL with the new Intune admin center was not working for me. If it's the same for you, then use https://endpoint.microsoft.com/TokenAuthorize/ExtensionName/Microsoft_Intune_DeviceSettings
The configuration should look like this:


Intune and ServiceNow integration allows helpdesk agents to use Intune to diagnose endpoint-related issues. This integration makes it easy for helpdesk agents to work with ServiceNow to solve endpoint problems. With ServiceNow integration, helpdesk agents licensed to use Remote Help and who use ServiceNow can view incidents that involve tech issues to learn more about the problem and see the details of the issue. This makes it easier for helpdesk agents to help the employee facing the issue and resolve it as quickly as possible.
The Intune ServiceNow Connector Integration helps manage ServiceNow incidents and issues by providing a ticketing system, device inventory, MEM insights, and software licensing and reclamation tools.


With the ServiceNow connector verified and enabled, you can view a real-time list of ServiceNow incidents for a worker from the Troubleshooting pane. The incident view with details helps you understand if there are other issues previously submitted by employees that may be related or have recurred.
This capability benefits your helpdesk and support agents as they can view a real-time list of ServiceNow incidents for users.
Thank you for being with me on this article for configuring ServiceNow with Intune. I hope it was helpful and that you now have a better understanding of the technical process involved.